Map
Tower of London map: the entrance, every tower, and a printable plan
Two maps on this page: a labelled plan of the whole fortress and our own numbered schematic, with the same numbers used on every place page and in the planner. Download the A4 PDF for the day; pick up the free official paper map at the entrance for wayfinding.
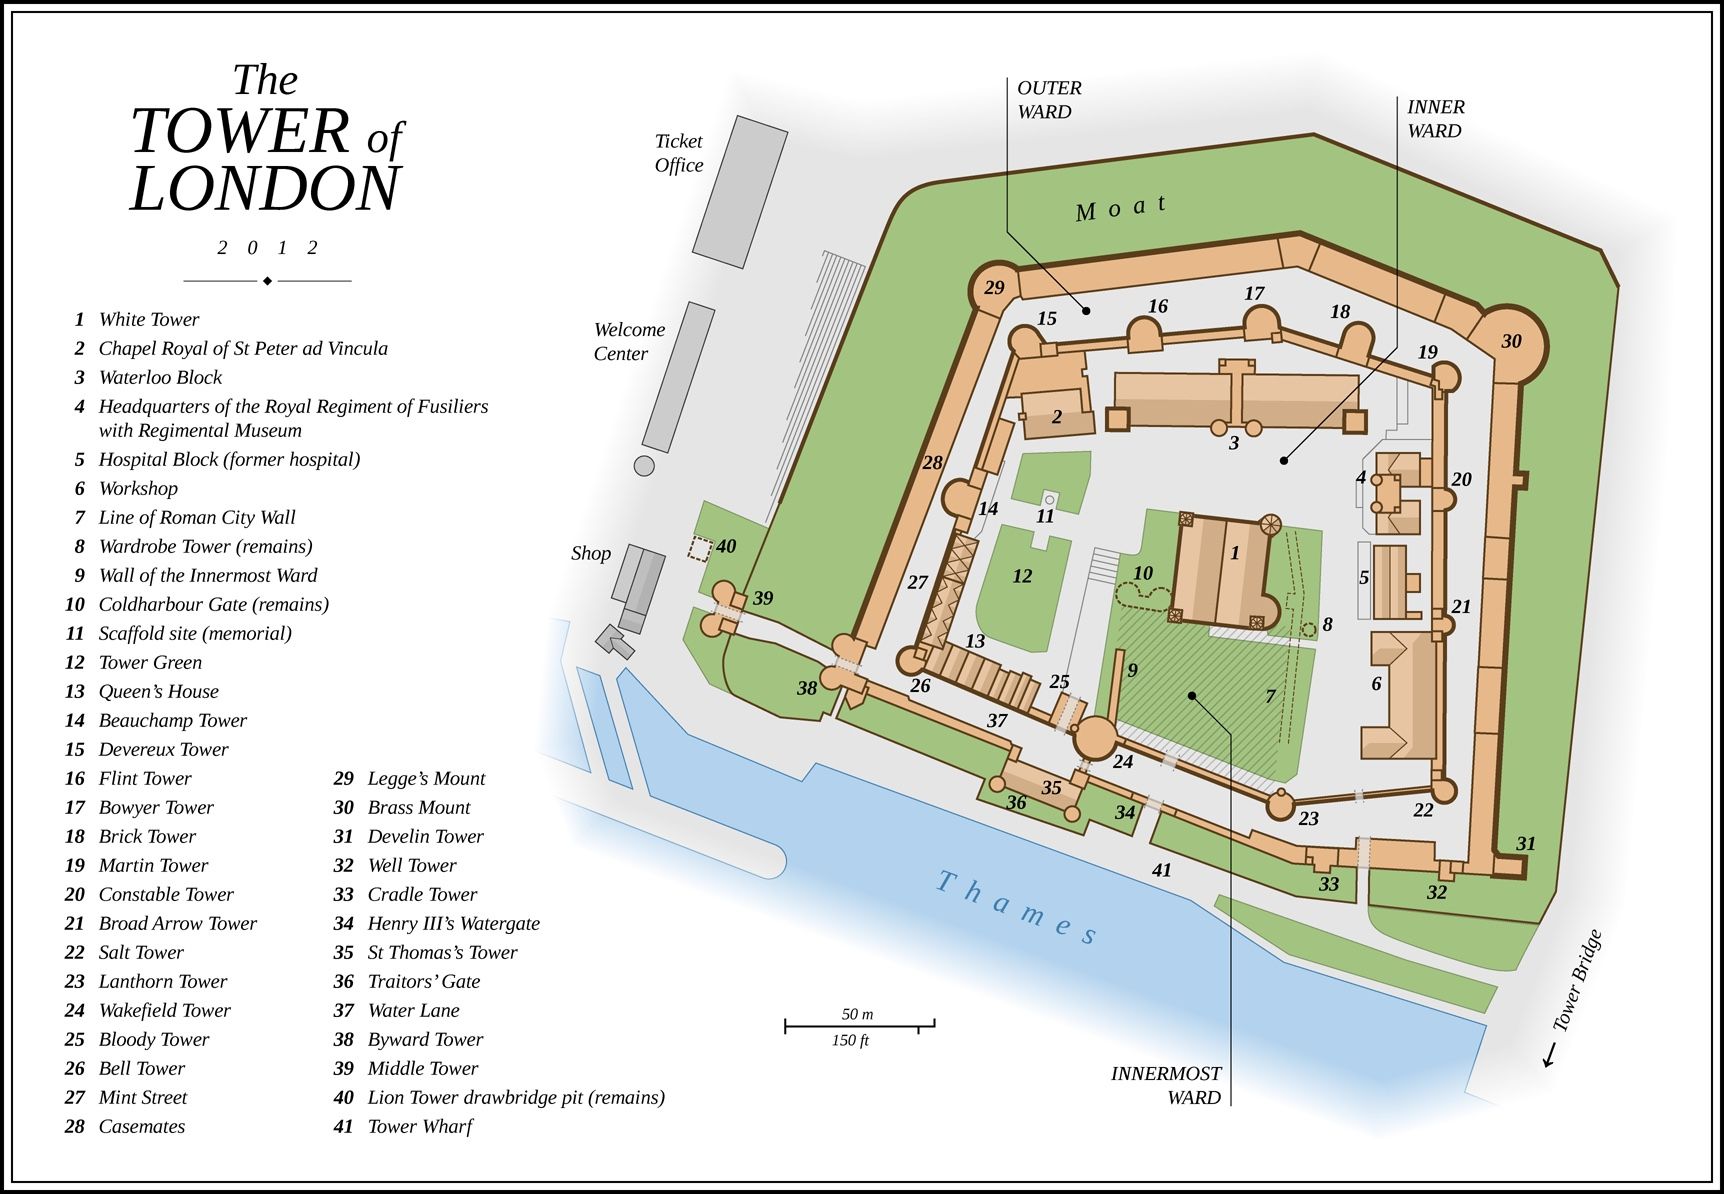
The labelled plan
A plan of the fortress with every tower and gate named, north at the top and the river at the bottom. The visitor entrance is at the bottom left (Middle Tower); the Crown Jewels are in the Waterloo Block at the top; the White Tower is the square keep in the middle.

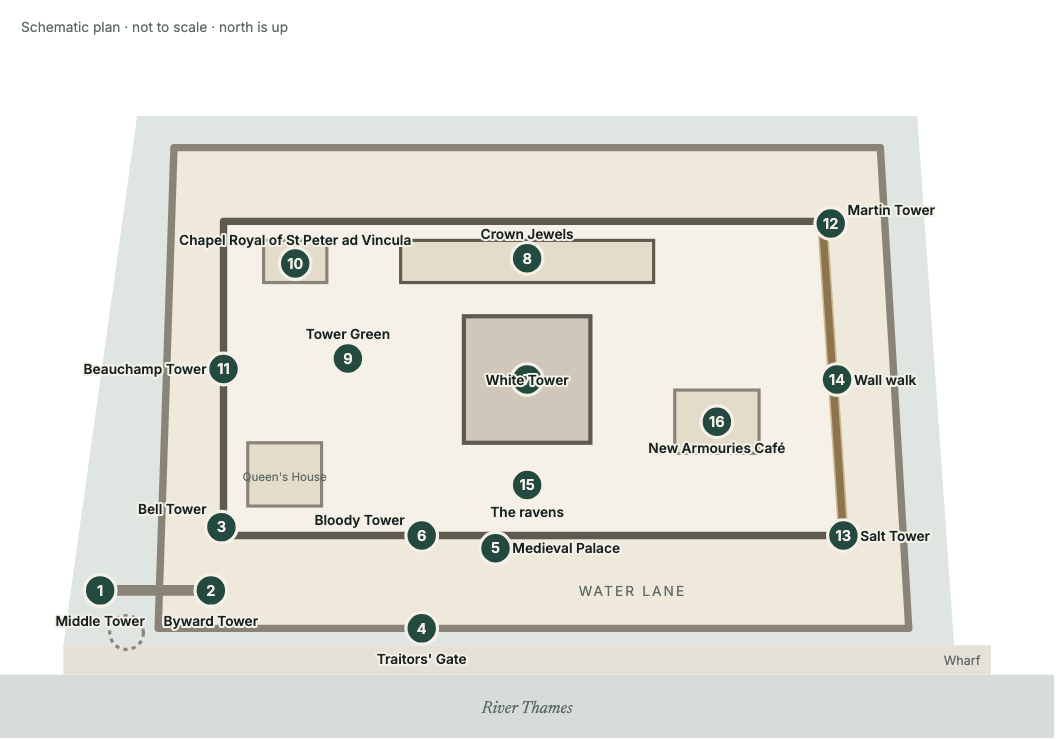
Our numbered schematic
Not to scale: it shows how the sixteen places we cover relate to each other. The numbers match the key below, the place pages and the stops in your saved visit.
Original schematic for this site; relative positions checked against the official map on 10 Sept 2026. Brass line: the wall walk. Dashed circle: site of the Lion Tower.
Key to the numbers
- 1
5–15 min · Step-free · story
- 2
5–10 min · Step-free · story
- 3
3–5 min · Step-free
- 4
5–10 min · Step-free · story
- 5
20–30 min · Not step-free
- 6
15–25 min · Not step-free · story
- 7
40–60 min · Not step-free · story
- 8
30–60 min · Step-free
- 9
Tower Green and the scaffold site
10–15 min · Step-free · story
- 10
Chapel Royal of St Peter ad Vincula
10–15 min · Partly step-free
- 11
15–20 min · Not step-free · story
- 12
10–15 min · Not step-free · story
- 13
10–15 min · Not step-free
- 14
25–40 min · Not step-free · story
- 15
5–10 min · Step-free · story
- 16
15–30 min · Step-free
Where the entrance is
- The visitor entrance is on the west side, through the Middle Tower, reached by the causeway over the dry moat from Tower Hill.
- Tickets and the welcome centre are on Tower Hill, opposite the entrance; online tickets are scanned at the Middle Tower, where security checks happen.
- Inside, you pass the Byward Tower onto Water Lane. Yeoman Warder tours start just past here, by the Bell Tower; audio guides are collected from the shop on your left.
- The exit is back through the Byward Tower to the wharf. There is no re-entry.
- Nearest stations: Tower Hill (District and Circle), Tower Gateway (DLR), Fenchurch Street and London Bridge; Tower Pier on the wharf for riverboats.
How the fortress is laid out
- Outer ward: the strip between the two walls. Water Lane runs along the river side past Traitors' Gate; the toilets are in towers on this ring.
- Inner ward: through the Bloody Tower gate. The White Tower stands in the middle, the Crown Jewels to its north, Tower Green and the chapel to its west, the café to its east.
- Wall walk: along the top of the inner wall from the Salt Tower (south-east) to the Martin Tower (north-east). Stairs only.
- Wharf: outside the walls on the river, free to walk, with the best photographs of the whole fortress and of Tower Bridge.
The White Tower floor by floor
- BasementThe shop. The only lift in the building runs between here and the entrance floor.
- EntranceUp the external wooden stair on the south face. Royal Armouries displays begin here.
- SecondThe Chapel of St John the Evangelist, the most complete Norman interior in England, and the Line of Kings with Henry VIII's armour.
- TopArmoury in Action: things to lift, pull and aim. Spiral stairs link every floor; allow 40–60 minutes.
More in the White Tower story.

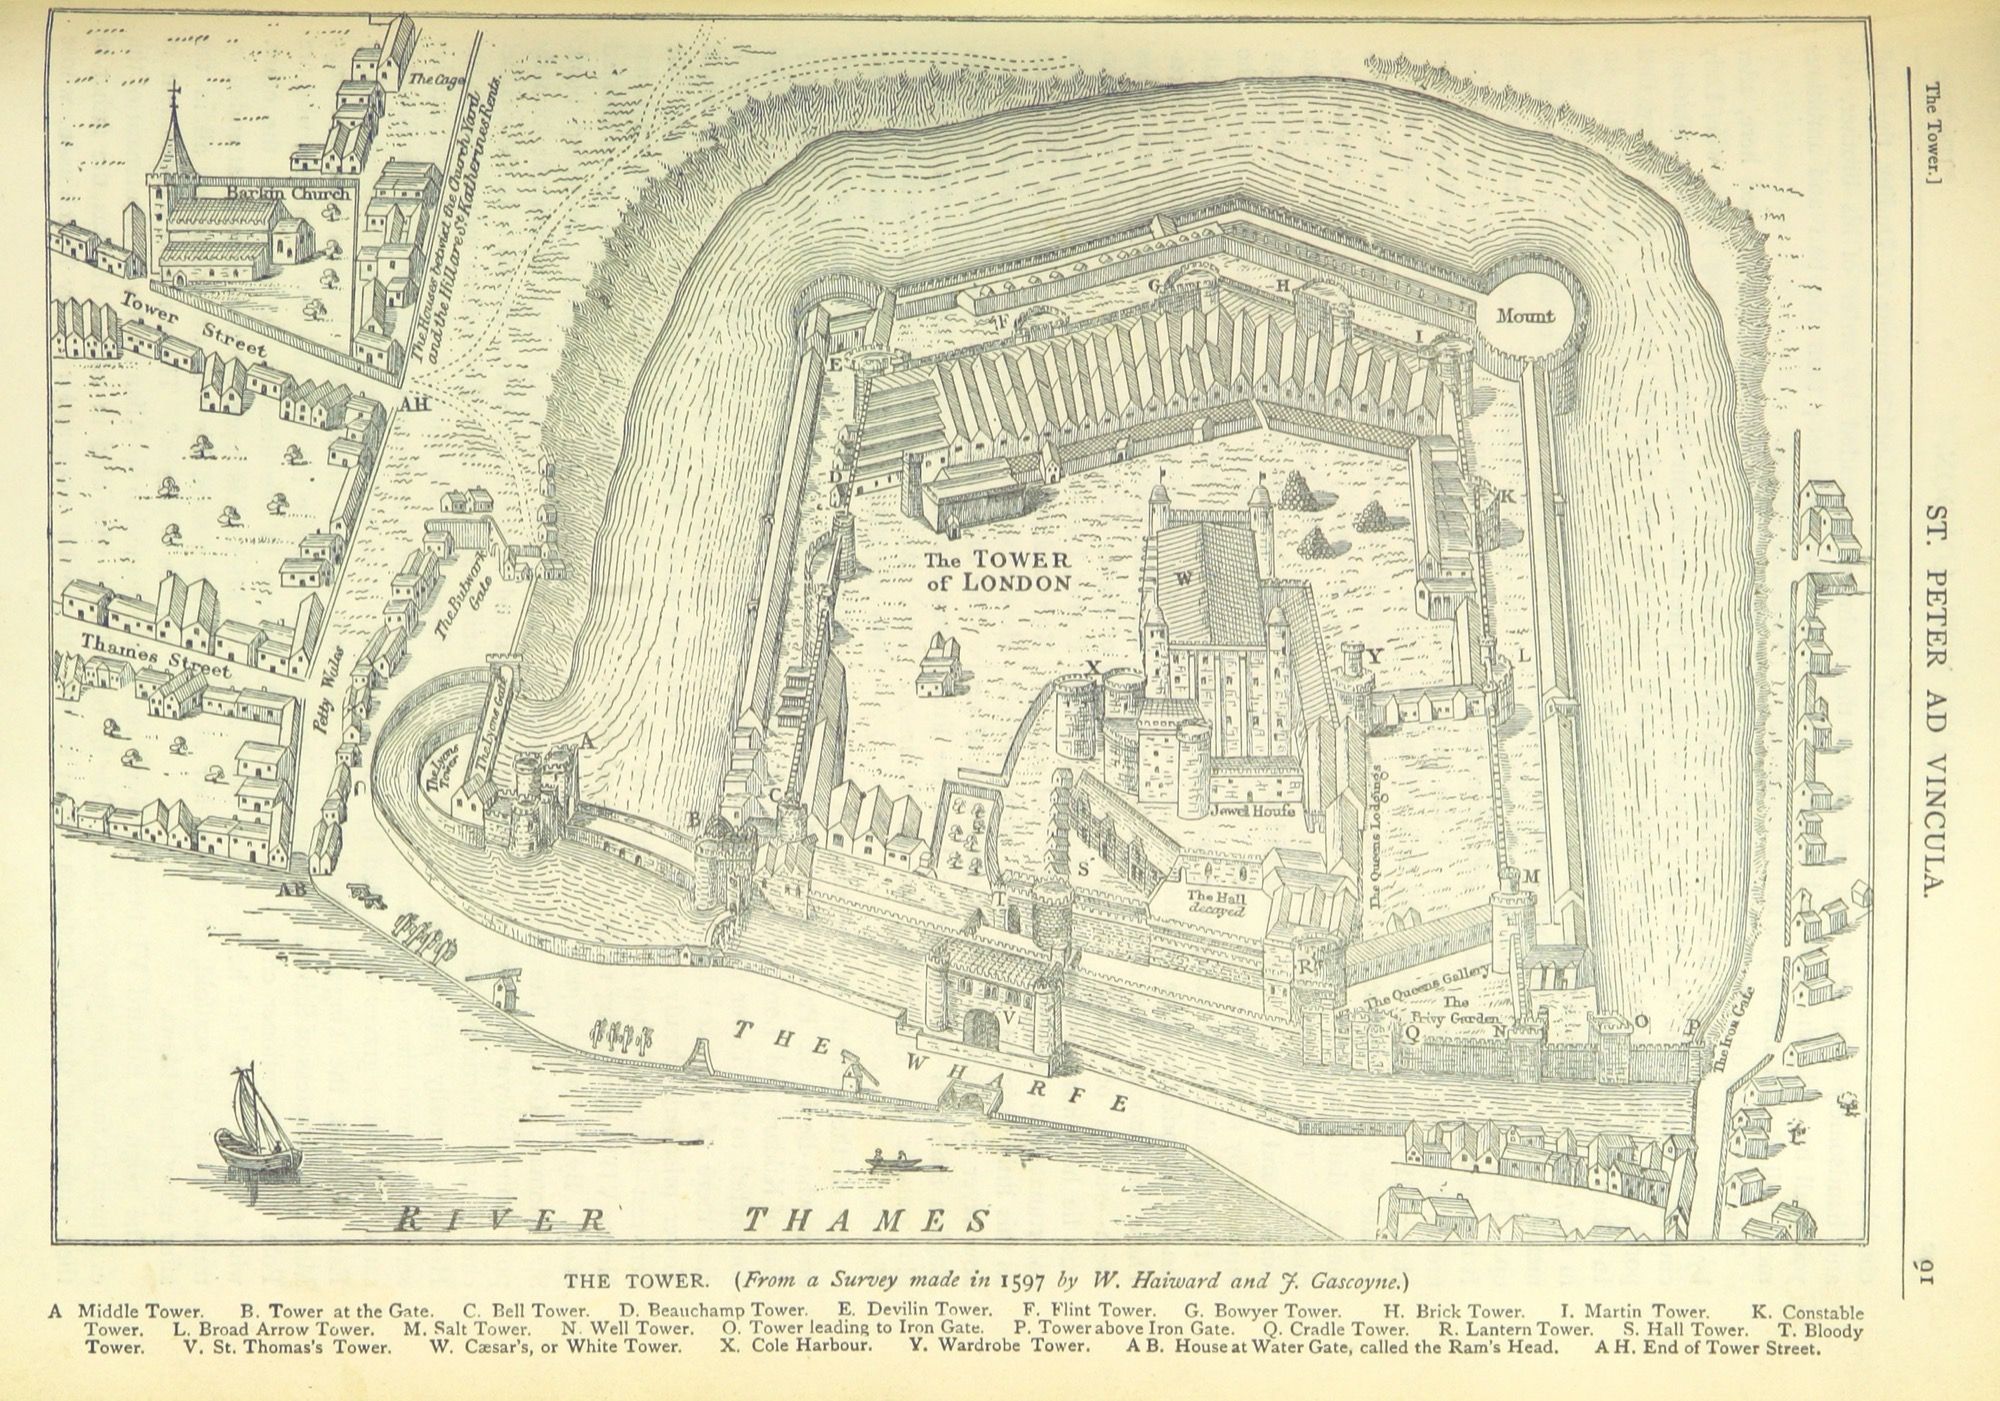
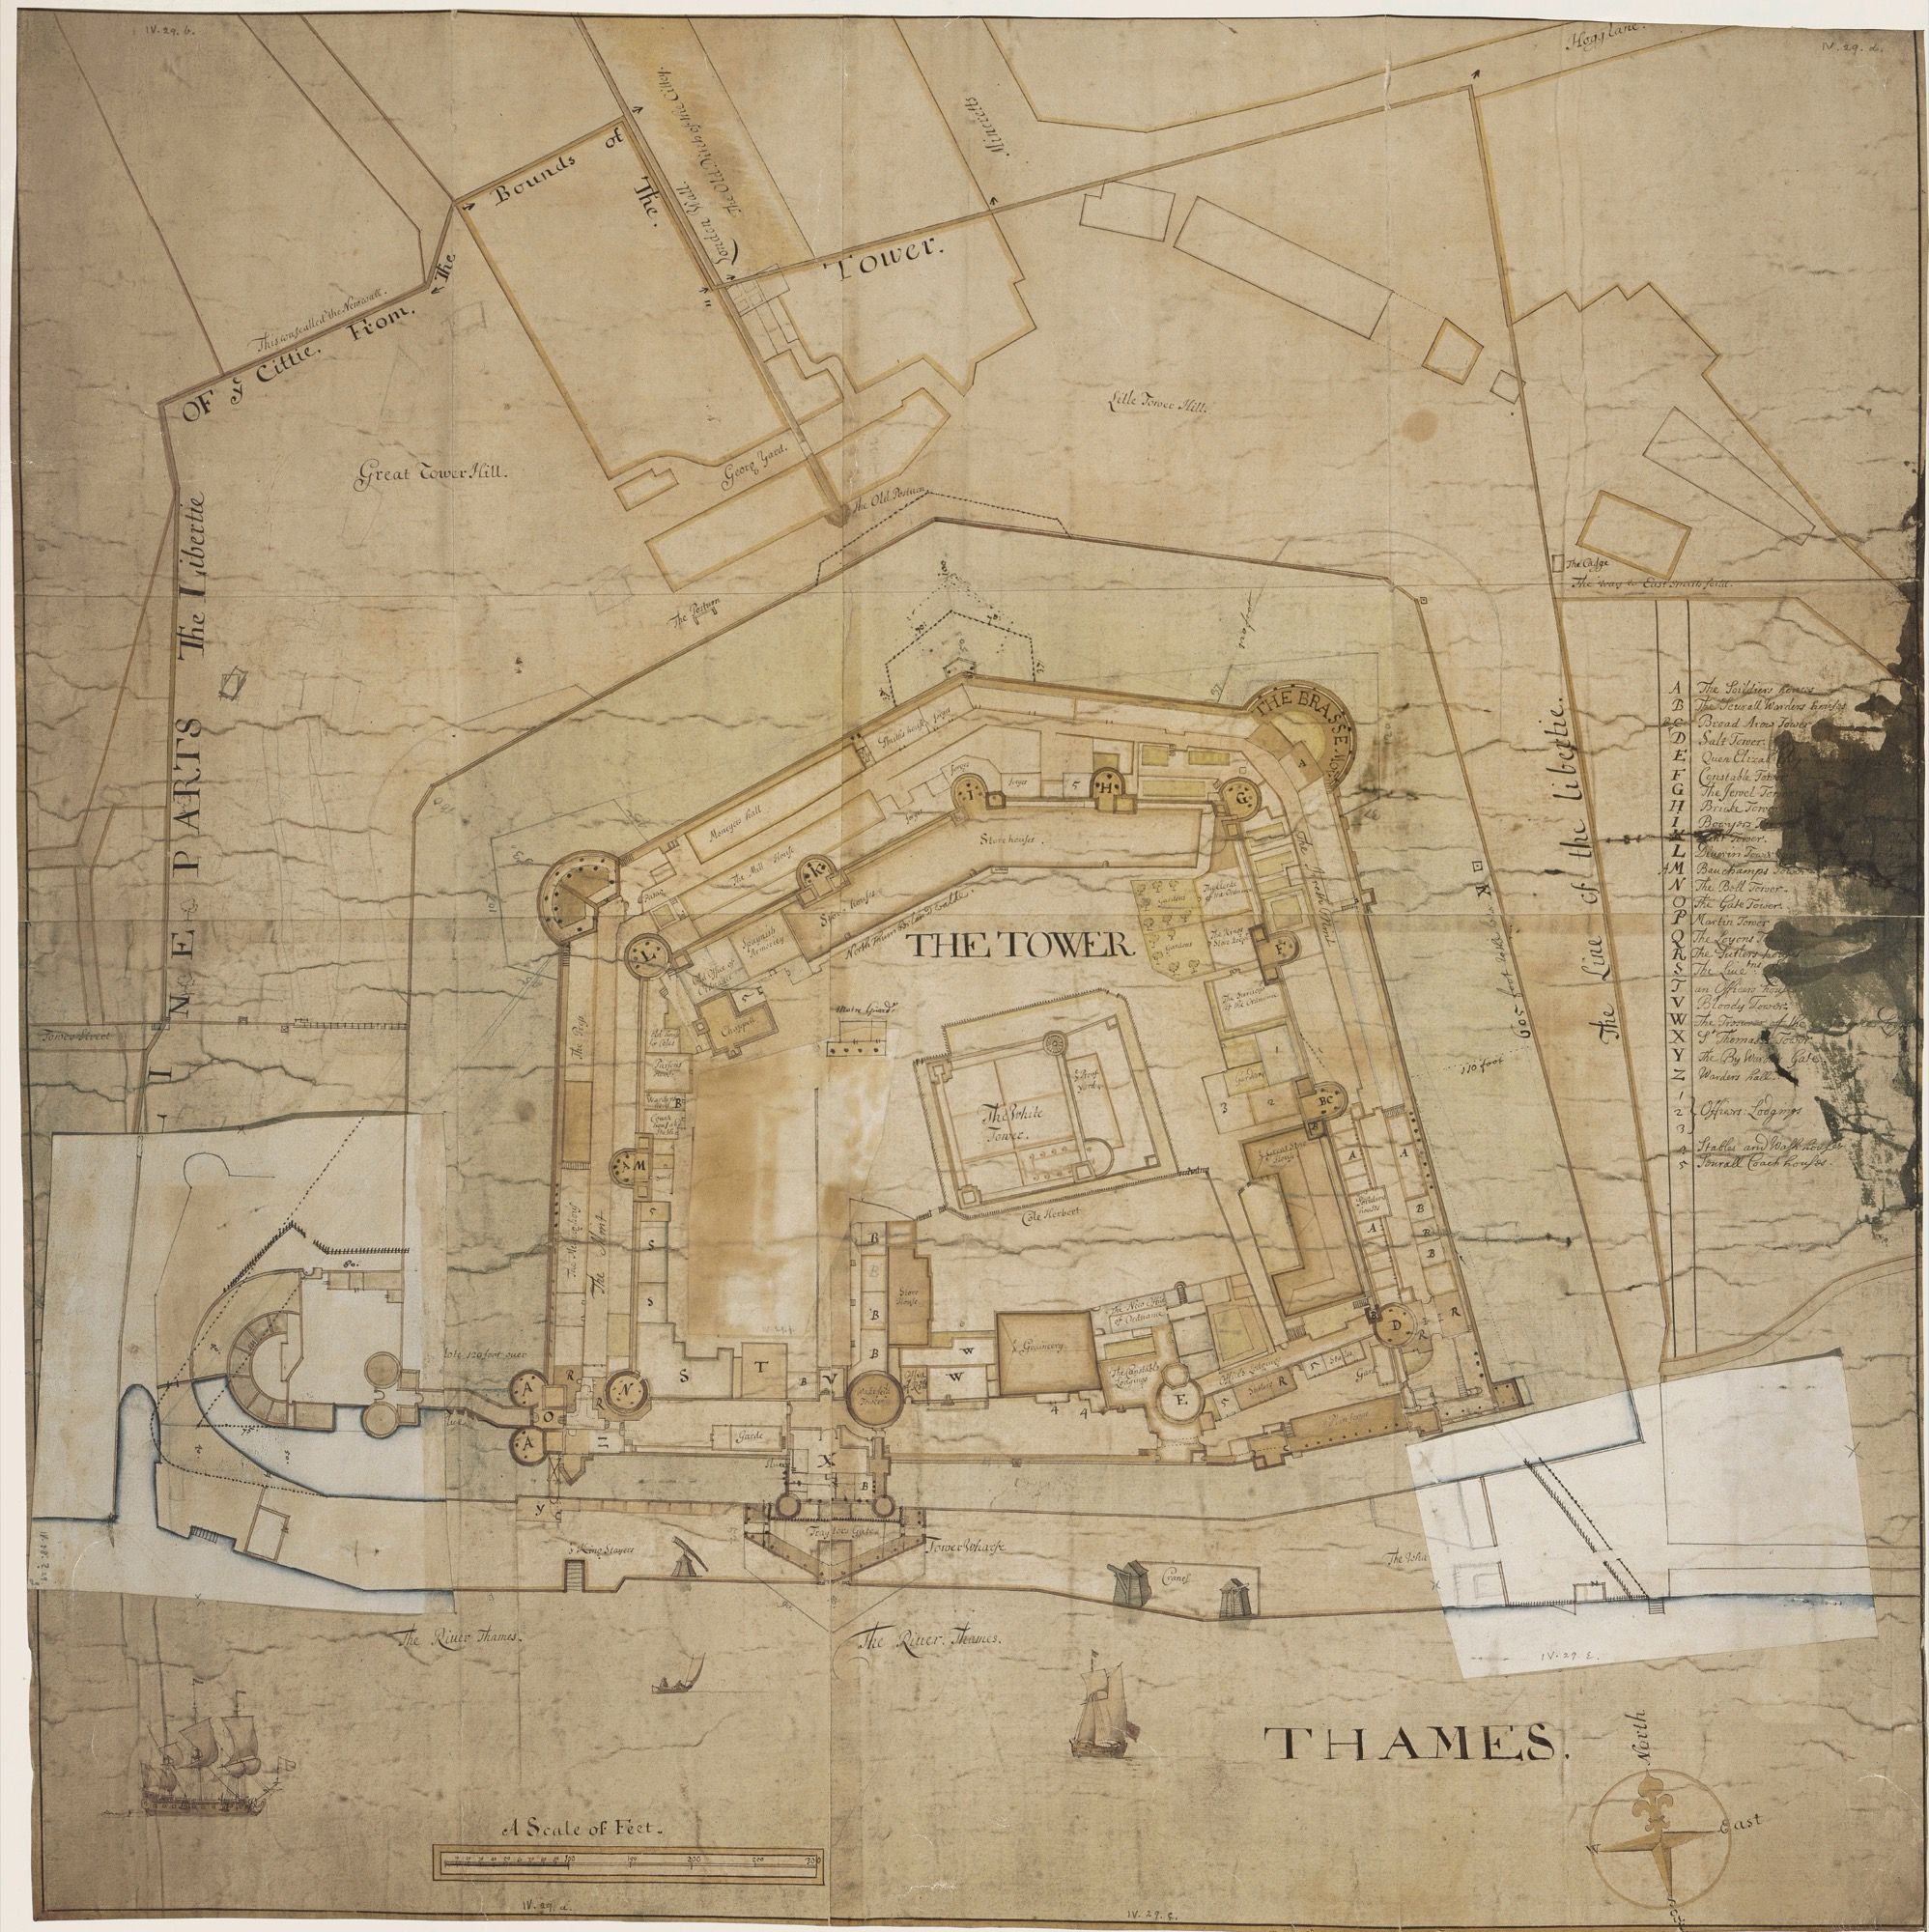
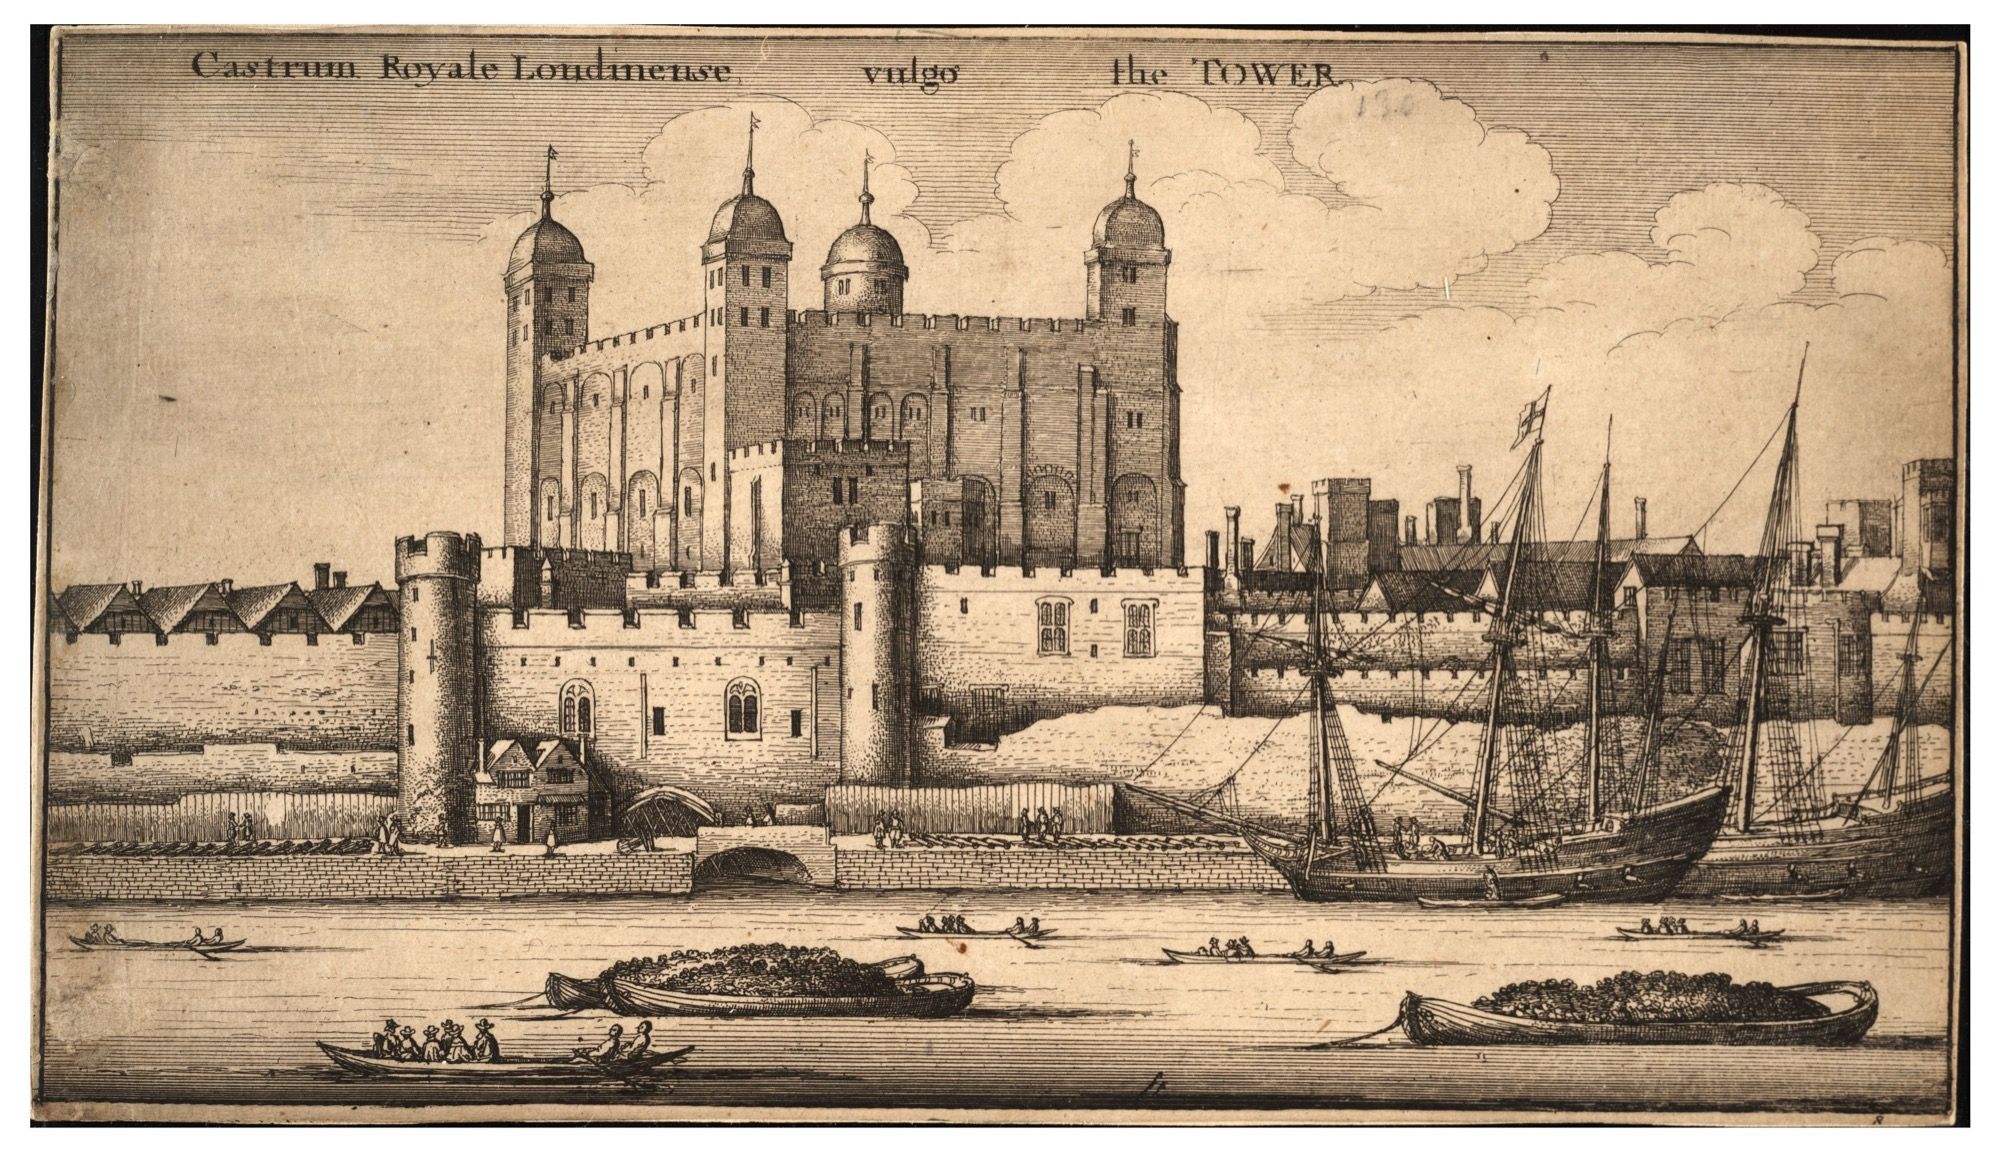
Historic plans of the Tower
The fortress you walk today is almost exactly the one surveyed four centuries ago. Three plans, all out of copyright, show how little the outline has changed.



Book
Tickets for the visit you are mapping
Everything on the map is included in standard admission. The guided option is for visitors who want the story of each place told to them on the way round.
- Official Admission
Standard admission (official)
Almost everyone: first visits, families, anyone happy to explore independently
From £37.00 adult · seen 10 Sept 2026
Who needs it, who doesn't, and the small print - Viator Guided tour
Small-group guided tour with early entry and a private Beefeater audience
First-time visitors who want a guide for the whole morning and the story behind what they are looking at
From €117 per adult, EUR · seen 10 Sept 2026
Who needs it, who doesn't, and the small print
Viator links are affiliate links: we earn a commission if you book, at no extra cost to you. Official tickets earn us nothing. Prices are what we saw on the date shown; providers show live prices in your currency at checkout. All six options compared.
Map questions
- Is there a Tower of London map I can print or download as a PDF?
- Yes. This page offers a free A4 PDF with a labelled plan, a numbered key to sixteen places, the entrance and exit, and access notes, plus a PNG of the plan for your phone. Historic Royal Palaces also hands out a free paper map at the entrance.
- Where is the entrance to the Tower of London?
- The visitor entrance is at the west side, by the Middle Tower, reached by a causeway over the dry moat from Tower Hill. The ticket office and welcome centre are on Tower Hill opposite the entrance. You leave by the Byward Tower onto Water Lane or the wharf; there is no re-entry.
- Where are the Crown Jewels on the map?
- In the Jewel House inside the Waterloo Block, on the north side of the inner ward directly north of the White Tower (number 8 on our plan). It has level access and is usually the longest queue of the day.
- How is the Tower of London laid out?
- Two rings of wall. The outer wall encloses Water Lane along the river; the inner wall encloses the inner ward with the White Tower at its centre, Tower Green and the chapel to the west, the Crown Jewels to the north and the wall walk along the east and south.
- What is on each floor of the White Tower?
- Basement: the shop (the only lift goes here). Entrance floor, up the external stair: Royal Armouries displays. Second floor: the Chapel of St John the Evangelist and the Line of Kings. Top floor: the hands-on Armoury in Action. All floors are linked by spiral stairs.
Entrance, exit and access details from Historic Royal Palaces, checked 10 Sept 2026. Plan by Thoroe (CC BY-SA 3.0) via Wikimedia Commons; schematic and PDF by this site.